Sunday, 16 October 2011

Autumnal treat... Plum and almond tart

My post today is about one of my favourite desserts, plum and almond tart. I have always loved desserts with fruits in them. They are usually very moist, most of them are easy to make and they take the guilt away from eating dessert! After all, eating a fruit tart is a way of getting one of your 5 a day!
The thing about this particular plum tart is that it's very easy to make, takes little time and is really succulent. The only problem about it is that it usually disappears fast enough. That is just an excuse to make another one then!
The great thing about making this tart now is that all-butter puff pastry has finally reached Ireland, so it's even easier to make. I used to make my own puff pastry before that. Obviously, I did not make plum tarts that often then as it is rather time consuming to make puff pastry from scratch. The thing though, is that puff pastry made out of anything else but better is rather horrible and insipid. So you really need to get an all-butter puff pastry. In most Irish shops, this is now stored in the frozen food section. That way, I always pick a few spare packs of frozen puff pastry in my freezer. They do come in handy for any type of pies, tarts...etc. So here is my recipe for plum and almond tart.


Plum and almond tart


Ingredients:
- A pack of frozen or even better fresh all-butter puff pastry
- About 8-10 plums (the dark ones are nicer), stoned and cut in half
- About 100gr of ground almonds
- One egg
- The juice of half a lemon
- About 100gr of sugar + a little extra
- Some flaked almonds

Method:
1. Preheat the oven at 180°C. Roll out the puff pastry on a tray or tart dish. Prick the inside with a fork to stop it from rising in the oven.
2. In a bowl, mix the egg, ground almonds, sugar and lemon juice. Spread that mix evenly on the pastry.
3. Put the plum halves on the tart.
4. Sprinkle a little more sugar on the plums and some flaked almonds.
5. Bake for 20-30 minutes, until the edges of the pastry are golden and the plums are soft.

Et voilà!

Sunday, 25 September 2011

Another cheesy night in!

It's this time of the year again, we can feel the winter coming already. Although, to be honest, it's felt like winter all summer long... Still, the days are getting shorter, the trees are losing their leaves and it's time to light the fire again.
I subscribe to a veg basket. And recently I have received one cauliflower a week. I have to admit that cauliflower is not on my favourite veg list. So for the past few weeks, the cauliflowers have been piling up in my fridge. I mean I took four of them and a romanesco (mix between broccoli and cauliflower) out of the fridge this evening! How ridiculous is that. So I decided to tackle my cauliflower problem.
The thing about cauliflower is that I couldn't think of any recipes apart from the obvious cauliflower cheese. So, I set upon making the cauliflower cheese dish.
I remembered that a while back, in the same way, I had attempted to get rid of a glut of cauliflowers already. I made cauliflower cheese but with some really pungent French cheese, freshly brought back from France. And to my surprise, it was beautiful. The pungent cheese, once melted, was actually a little nutty and sweet and was perfect to counterbalance the bitterness of cauliflowers. It reminded me of lovely days spent in the Alps skiing... and eating melted cheese dishes!
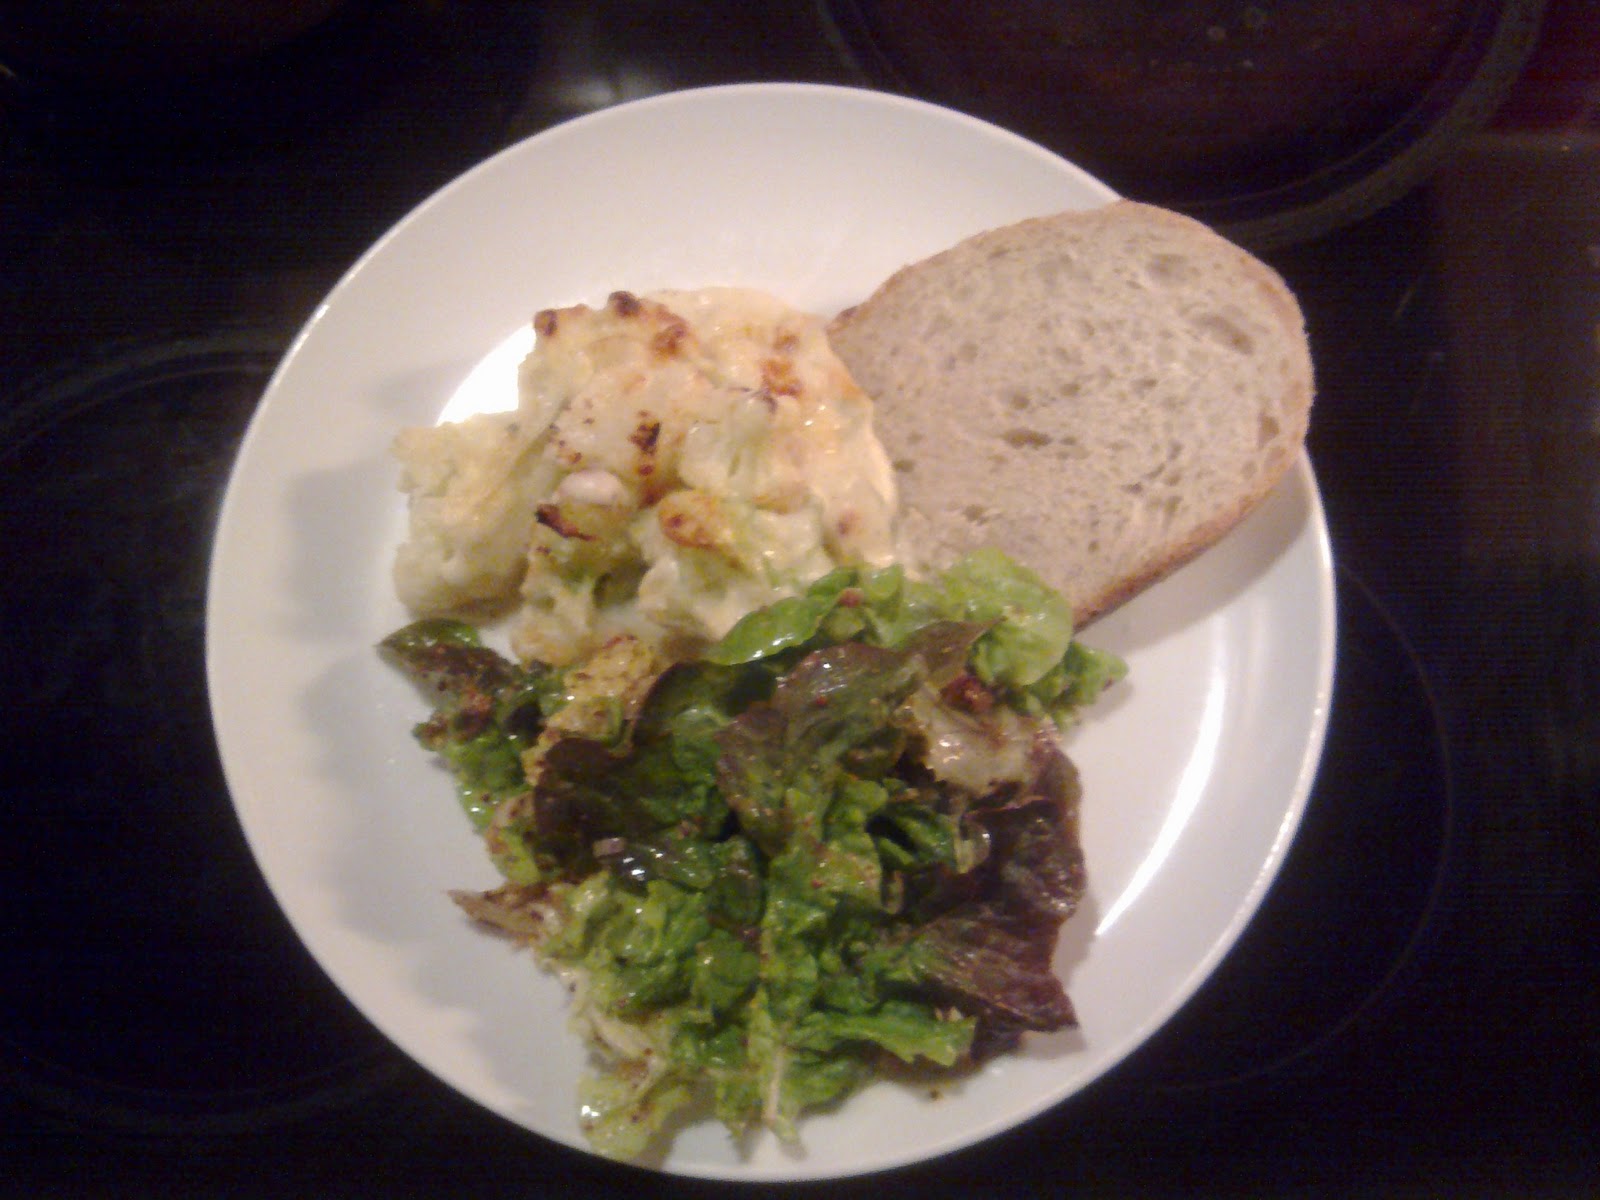
So, I decided to try that recipe again, just to be sure my finding wasn't just a one off chance. And guess what, it was absolutely delicious, I think I ate the equivalent of a full cauliflower by myself this evening. That and a slice of crusty sourdough bread and a nice tangy salad... Cheesy heaven!!!

So here is my recipe for  Cauliflower cheese.


Cauliflower Cheese


Ingredients:
- 4 medium cauliflowers
- 1 romanesco
- 500 ml of milk
- 50 gr of butter
- 50 gr of plain flour
- 100 gr of grated Swiss Gruyère or other pungent cheese (don't worry, once melted it doesn't smell any more!), ask your cheesemonger's. Be brave, it really is worth it!
- Pinch of nutmeg
- Good pinch of salt
- Some black pepper

1. Preheat the oven at 200°C.
2. Remove the outer leaves of the cauliflowers and the romanesco, keep them whole though and steam them for 8-10 minutes.
3. In the meantime, melt the butter in a saucepan, once melted, add the flour and whisk until you get a kind of paste.
4. Then, add the milk, salt, nutmeg and black pepper. Keep whisking on the heat until the sauce thickens. Remove from the heat once thickened.
5. By now, your cauliflower and romanesco should be ready. Remove them from the pan and carefully cut them into florets (use a tea-towel to protect your fingers from the heat) into a baking dish.
6. Cover with the sauce, add the grated cheese on top. Bake for about 30 minutes or until golden.

I served mine with a green salad with a mustard dressing and crusty sourdough bread to mop up that cheesy sauce!

Bon appétit!

Monday, 19 September 2011

Answer to the previous poll... at last

Hello all,

I have been quite busy recently and unable to blog as much as I wanted. The good thing, though, is that I am now going to be able to blog again! Not sure whether this is such a good thing or not.
Anyway, the other reason I have not been able to blog is that the last poll I posted was about dessert and I was asked to post an easy and/or chocolate recipe. The problem is that, as I am mostly on my own, I tend not to cook desserts and especially chocolate dessert. If I do, I end up eating chocolate for the rest of the week. Now that the winter is on our doorstep again, I don't mind so much. I need the calories! And on top of that, I thought of an idea to make a dessert that lasts for a while. I decided to make ice-cream!
So, I did make that easy chocolate dessert two days ago: I made white chocolate ice-cream.


White chocolate ice-cream


Ingredients:
- 250 ml of cream
- 250 ml of full-fat milk
- 6 egg yolks
- 75 gr caster sugar
- The seeds of a vanilla pod

- 100 gr of good quality white chocolate, cut into squares
- White chocolate drops


Procedure:
1. Heat up the milk and the cream in a saucepan until very hot (do not boil).
2. Whisk the egg yolks with the sugar together.
3. Pour the milk-cream mixture into the egg-sugar mix whisking.
4. Pour the mixture into a saucepan with the vanilla and heat up slowly until the mix coats the back of a wooden spoon.
5. Take the mixture off the heat when it's reached the proper consistency. Put the white chocolate squares into it and mix well until melted. Let the mixture cool. Once cooled, add the white chocolate drops into it.
6. Pour into an ice-cream maker or a plastic box and freeze.

Et voilà!


Serving suggestions:
As you can see on the picture, I served the white chocolate ice-cream with praline crumbs and dark chocolate sauce.
This evening, we had some of the ice-cream with fresh strawberries, strawberry coulis and meringue. It was gorgeous!

Saturday, 6 August 2011

Next poll

Hey all,

I am not sure whether many people follow this blog but I will post a dessert recipe next and I need help choosing. Please vote in the poll section of the blog!

Saturday, 30 July 2011

Chinese inspired meatballs

I could not "not post" a Chinese inspired recipe. I was fortunate enough to spend about 3 weeks out there and to attend an afternoon cooking lesson. It was interesting seeing what their staple cooking station looks like. As you'd imagine, they rely on woks a lot. The main seasoning ingredients lined up beside the wok were salt, sugar, corn flour, chicken stock, oyster sauce, soy sauce, rice wine and toasted sesame oil. Quite a change from our vinegar and olive oil!
A friend suggested earlier I should post a Chinese recipe but with the lovely weather outside (rain and 10°C), I felt more like a Western dish. After thinking for a while, I decided to make a Chinese inspired broth/soup with veggies, meatballs and some rice on the side. You could easily served this dish with boiled noodles. I didn't have any so I had rice. Clearly a warming up dish for the winter we are having in the middle of the summer!


Ingredients:

For the meatballs (makes about 20 meatballs):
- a pound of minced beef
- 1cm piece of ginger chopped
- 1 tbsp of toasted sesame oil
- 2 tbsp of soy sauce
- 1 tbsp of black bean sauce
- pepper
- 1 egg
- 2 tbsp of breadcrumbs (no need to buy breadcrumbs, just put your stale white bread into a food processor)

For the veggies:
- 1 tsp of chilli paste
- 2 cloves of garlic, thinly chopped
- 1 cm piece of ginger thinly chopped
- 1 celery stick cut into thin cubes
- 2 carrots, peeled and cut into thin batons
- 1 small courgette, cut into thin batons
- 1 bunch of sugar snap peas
- 3 spring onions cut into 2 cm pieces
- a pint of stock
- 2 tbsp of soy sauce
- 2 to 3 tbsp of vegetable oil


Some boiled or steamed rice/noodles.

Procedure:

1. Prepare the meatballs: mix the meat, ginger, soy sauce, black bean sauce, pepper, sesame oil, egg and breadcrumbs. Shape into meatballs and leave aside for about 30 min.


 Once rested:


2. Start cooking your rice or noodles.
3. In a wok or large and high frying pan, heat up about 1 tbsp of oil on medium to high heat. Brown the meatballs. Remove the meatballs and set aside.
4. Add the rest of the vegetable oil, about 1 to 2 tbsp. Add the chilli paste, garlic and ginger. Stir fry for 2 minutes. Add the celery and carrots, stir fry for about 4 min.
5. Then, add the courgettes, stir fry for 2 min. Add the stock and the soy sauce. Bring to the boil. Add the meatballs. Reduce the heat, put a lid on and simmer for about 10 minutes.
6. Remove the lid, add the sugar snap peas, cook for another 2 minutes.
7. Serve sprinkled with the spring onions.

-

Pain brun pour les Français

Pour les Français, les ingrédients sont les suivants:
- 1 tasse/mug de farine complète
- 1 tasse/mug de farine type 80
- 1/2 tasse de son de blé
- 1 cuillère à café rase de sel
- 1 cuillère à café bombée de bicarbonate de soude
- 450/500ml de lait ribot ou babeurre (si vous n'en trouvez pas, vous pouvez en faire vous-même en mettant 1 litre de lait dans un saladier avec 1 cuillère à soupe de jus de citron frais, laissez le lait se séparer 15 minutes. C'est prêt!)
- 2 cuillères à café de molasses (du miel marche aussi), c'est facultatif
- des graines

1. Préchauffer le four à 220°C. 
2. Bien mélanger les farines, le son, le bicarbonate et le sel. Vous pouvez y ajouter des graines de citrouille si vous le souhaitez.
3. Ajouter le lait ribot/babeurre jusqu'à obtenir une consistance assez liquide (mais épaisse quand même).
4. Ajouter la molasse. Bien mélanger.
5. Verser dans un moule à pain. Saupoudrer de graines si vous le souhaitez, d'habitude j'utilise des graines de sésame et de pavot.
6. Cuire pendant 35 minutes puis sortir le pain du four, le retourner dans le moule de façon à ce que le dessous du pain soit à la chaleur vive. Remettre au four 10 minutes.
7. Sortir du moule à la sortie du four et laisser refroidir.
Voilà c'est tout!

Answer to Alicia's request - Brown bread

While I was away in China, a friend of mine got in touch via Facebook to ask me whether I had a recipe for Irish brown bread. The thing about China is that Facebook is censored so you cannot get access to it at all. So, although I am back from China and should be posting Asian recipes, well I am starting back with an Irish recipe to answer my friend's request.

I really like Irish brown bread. Despite this, it actually took me years before I attempted to make it. I had presumed that, like French bread and most white breads, it needed a lot of work and attention. I was quite surprised to find out that brown bread is made in 5 min, cooked in 45 min and is pretty much ready to eat in less than an hour. Needless to say, I have now caught up with all those years without making it. I now make it regurlarly.
When I know the bread loaf is not going to be eaten in the next two days, I usually bake the dough in muffin trays, that way I have mini brown bread muffins/loaves that can be used as needed. They can also be frozen that way and it is a lot easier to thaw them than to defrost a whole loaf of bread.

I think my favourite accompaniment to brown bread is probably home cooked ham, boiled eggs, cheese and an assortiment of salads... Great for picnics, rushed lunches and snacking!


Enjoy!


Ingredients:


- 1 mug (cup or other implement) of coarse white flour
- 1 mug of wholemeal flour
- 1/2 mug of wheat bran
- 1 teaspoon (not heaped) of salt
- 1 heaped teaspoon of bicarbonate soda
- About 450-500 ml of buttermilk
- 2 teaspoons of treacle
- various seeds

Procedure
1. Preheat your oven at 220°C.
2. Mix the coarse white flour, wholemeal flour, bran, salt, bicarbonate soda (you can add pumpkin seeds or any other seeds at this stage if you wish) and stir well.


3. Pour in the buttermilk until you obtain a fairly wet dough. The dough should be easy to stir. Stir well.
4. Add the treacle to the mixture, stir well.


5. Pour the mixture into a bread baking tin (I use a silicone one so I don't need to oil it, but if you use a metal one, make sure you oil it and flour it). Sprinkle some seeds on top of the bread.


6. Bake in the oven for about 35 min. Then take the bread loaf out of the tin, turn in upside down and bake for a further 10 min. If you are using muffin trays, your bread will be baked in about 20 min and you won't need to turn the muffins over during the baking process.
7. Take the bread out of the tin or muffin trays and leave to cool on a rack.